Ingredients
Method
- Do not be scared of yeast - it is fun to work with. If you are new to yeast cookery, don't give up if your first attempts are not as successful as you would wish. I can recall many disasters, but toasted or turned into a bread and butter pudding they were fine.
- Making bread is very rewarding, the therapeutic nature of kneading the dough is amazing and the smell of freshly baked bread wafting forth is mouth-watering.
- Take 5 minutes to digest these important points before beginning.
- Bread needs salt for good structure and taste; do not leave it out. Without salt the yeast cannot work properly
- Use high grade flour i.e. flour with high protein content that is recommended for bread making. Read the packet. Standard flour does not have as much protein and does not develop as much gluten.
- Have everything weighed and prepared before starting.
- I always dissolve the yeast first with a pinch sugar. I know the Surebake bottle does not tell you to do this, but I do. It's a safety net to make sure the yeast is alive and it certainly helps to dissolve the yeast grains.
- Breads will taste better and look better if the dough is given plenty of time to rise in a cool place. This goes against everything we normally say. "Put in a warm place to rise" is often taken to mean a very warm place and the doughs can rise too quickly. Covered with plastic wrap and a towel in a kitchen is fine. If it is winter then, yes, you may need to find a sunnier spot.
- The main measure of water in each of these recipes uses cold water straight from the tap. This alleviates any worry about whether the water was the right temperature and it helps keep the dough cooler, longer.
- Bread recipes often have the instruction to knock back the dough. This is now considered out-dated. It is believed that if you knock the dough back too firmly you will never regain the lovely delicate bubbles that give even rise to the bread. So when you turn the dough out after proving, gently deflate the dough.
- Breads have a more golden colour and crisper crust if you can include steam in the first 3-5 minutes of cooking. To do this, spray the sides of the oven 6-10 times with water from a standard spray bottle as soon as you put the bread in, and repeat this every minute for 3 minutes.
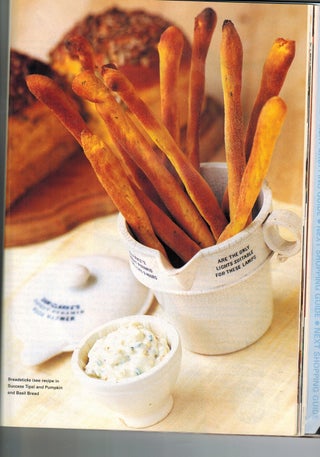
- Most savoury doughs can be used to make bread sticks, which are a good way to use up any remaining pieces. Once the dough is proven and deflated, take large walnut sized pieces and roll out, rest and re-roll until thin. Rest 3-5 minutes and then place on a hot tray or bread stone, mist with water once only and bake at 220°C for about 5 minutes.
- All these recipes are cooked on, or with a bread or pizza stone in the oven. Or use heavy terra-cotta tiles. Allow 30 minutes pre-heating time for the tile to reach temperature.
- In all these recipes I have allowed for a first initial rest period after mixing. This helps the gluten relax which cuts down the actual kneading time and gives dough that is smoother and more supple
- The dough is kneaded sufficiently when it is smooth and stretchy. Place the dough on the bench and pinch a ridge along the top. If the ridge stays, the dough is kneaded enough, if it collapses, continue to knead.
- The dough has proven enough when you can push your finger into the dough to make a deep indentation that does not spring back.
- When rolling doughs or shaping into loaves keep them tightly formed to give structure and body to the bread.
- Use a razor blade to score the crust. Failing that, a very sharp knife. Or cut a pattern with scissors.
- I have used Surebake because for the home baker it does give more confidence for success. If you prefer to use active dry yeast the quantities are also given. Fresh yeast is too difficult to obtain and store for domestic use
- I prefer when making dough in the bread machine to take the dough out 10 minutes before the time is up as I found it to be too warm.


Comments (0)
Please login to submit a comment.